
XBee to SmartThings Continued.
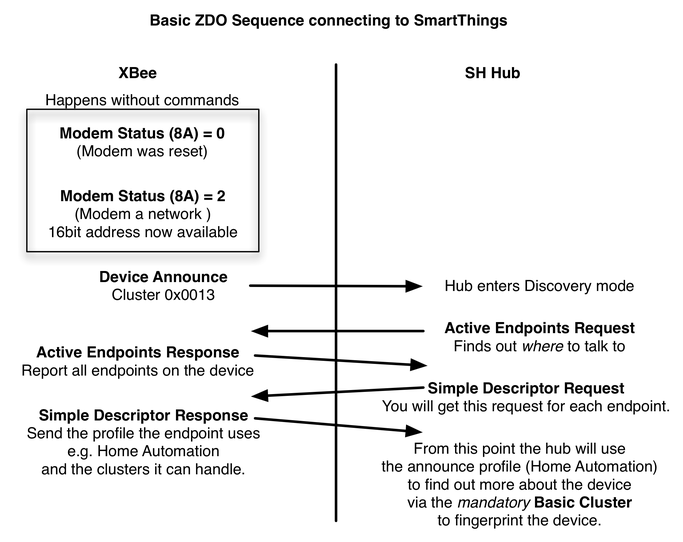
So A quick re-cap of what we've done so far from a flow viewpoint.
A few assumptions are made including that the hub is allowing connections.
e.g. "Add a Thing"

Garage Door Opener
Lets make this a bit more interesting and use my garage door opener project for a description of how this all connects.
For this project the device needs to handle the mandatory clusters for the device type as noted in the ZigBee Home Automation specification.
The device only needs the ability to toggle a relay to open the door and report back whether its closed or not.
In order to turn on the relay it needs to support On/Off output clusters and to report open or closed it needs to support Binary Input Clusters
(The whole input vs output can be confusing)
Zigbee HA Profile
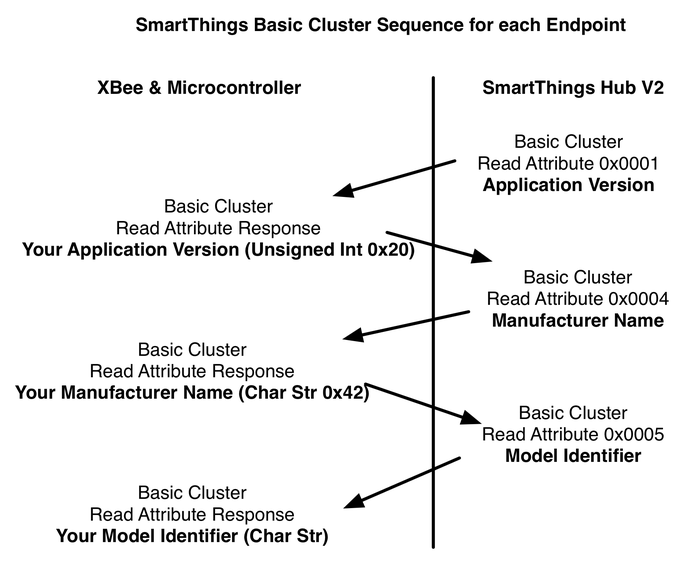
After sending out the Simple Descriptor the hub knows that the endpoint is a Zigbee Home Automation (ZHA) endpoint. From here the packets will change from ZDO packets to ZHA packets and the hub will query the endpoint further as shown below.
As we can see in the Zigbee HA spec. ALL devices share two mandatory clusters.
Basic and Identify.
So with this information we will use the following clusters when we reply with the Simple Descriptor Response we will say that incoming clusters supported will be
Basic - 0x0000
Identify - 0x0003
On/Off - 0x0006
and our outgoing clusters will be
Binary Input - 0x000F
SmartThings now has enough information to fingerprint and identify the device. If there is a device handler that matches the information we have given it, namely the Cluster in/out fingerprint and the version/manufacturer/model then the "thing" will be associated with its correct device handler and will appear as the correct device on SmartThings. If no matching device handler exists, the device will appear as "Thing".
Just for the sake of demonstration, I have included a very rough attempt at a device handler. I make no apology for the fact that I know nothing of Groovy so the fact that it works is just another example of a miracle. I'm sure the more Groovy savvy of you will make something a lot more elegant. There is also parts of the code that is redundant that I used for testing etc. I've left it in but in a production DH it would ideally be removed.
Hardware
So in keeping with making this a bit of a fun project, what sort pf hardware do we need?
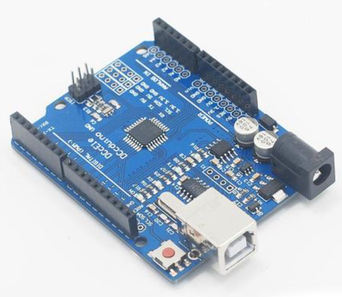
Well I'm basing this around an Arduino Uno since they are relatively cheap and plentiful.
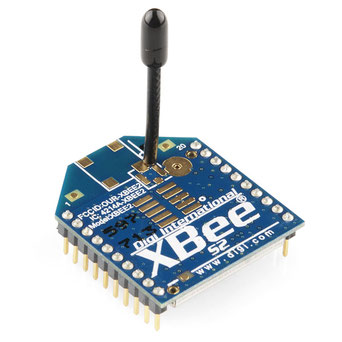
The heart of the show is the XBee.
There are several types. To choose what you need you need to understand a few things. People often use the term Xbee and Zigbee interchangeably. This is WRONG!
Xbee is hardware, Zigbee is a protocol.
SOME Xbees are designed to handle Zigbee. Most are not.
The Series 1 XBees while cheap, don't handle Zigbee.
You also don't need a Pro Xbee. You will get great range from one but your wallet will be lighter. Also, don't get a programmable XBee.
Basically, the XBee of choice for this project is a Series 2 Xbee ZB series.
Some other varieties will work but this is what I use.
Of course if you've been following along, you'll already know all this and have it set up via XCTU on the previous page.

We also need some way to connect the XBee to the Arduino. You can of course breadboard it but the simple way is to use an XBee shield of some sort. Some are better than others.
The one I have (Not the one pictured) can short pins to the USB connector on the Arduino. With that said however, I do like the fact that it has RSSI and Pairing LEDs so you can see what's going on a bit more.
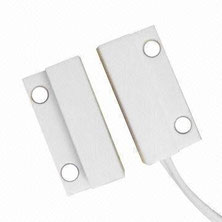
A simple way to sense that the door is shut is a magnetic reed switch. You could put fancy sensors on the door but these don't need batteries and they are cheap. They just need a bit of wire and some hot glue to install them.
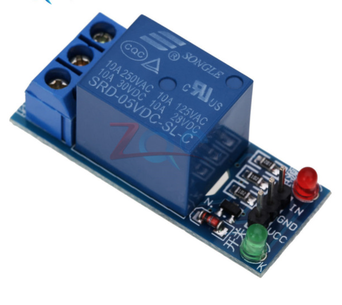
Lastly, we need a relay of some sort to be able to carry the larger voltage and current to switch the garage door opener.
The one pictured is a single relay. You can also get relay shields with various number of relays.
There is also an XBee shield that has two relays on it. The possibilities are endless.
Connect it up
I need to make a bit of a wiring diagram however it is very simple.
The important points to note are, if you use my Arduino code below, I have connected the relay to digital pin 4.
The door closed sensor is connected across digital pin 8 and I also have a wire that can short digital pin 7 to ground. I use this to inhibit the transmission of the Device Announce. This was just a temporary solution while I got it going but like all these things, I haven't finished it!
As noted previously, it's also important to connect pin 9 on the XBee to ground to stop it from falling asleep. You can of course change the programmed settings but this is a good reliable way of getting it done.
Making it go
Once you have the hardware all connected up you need to get the Arduino code sorted out.
Firstly you will need a copy of the XBee Arduino Library in the appropriate folder in your Arduino IDE.
I would also advise to install a device handler (Mine is above) into the SmartThings IDE at this stage so that when your XBee joins the network, SmartThings can fingerprint it correctly and join it all up.
Next, you can obviously write your own Arduino code, and I do recommend it since that's the best way to learn by taking it slow but you can download my sketch and upload it to your Arduino.
Make sure at this stage that the pin grounding pin 7 is removed and open the serial Monitor in the Arduino IDE.
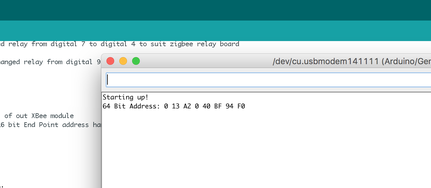
You should get a "Starting Up" and you XBee 64 bit address will print below it.
If the address doesn't show I'm guessing you ignored the bit about grounding pin 9 and your XBee went to sleep!
That's all you'll get right now, read on.....
Next you need to go to the SmartThings App and select My Home and select the + to add a new thing.
Once you've done that, press the reset button on your Arduino again. This will start the pairing process. The "Starting Up" will show again along with your 64 bit address. After a short delay you will notice more activity as the XBee joins the network and the device discovery process gets underway.
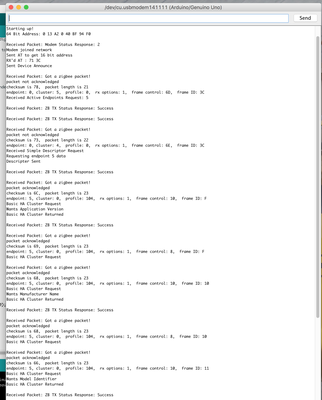
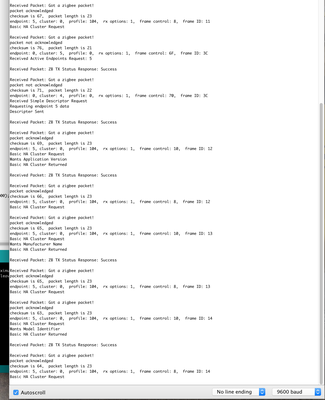
It should look like the pictures above. You can see the pairing and device discovery/fingerprinting process. (You can click on them for a better look)
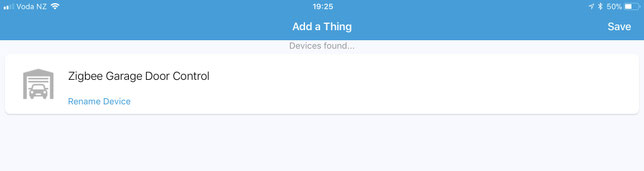
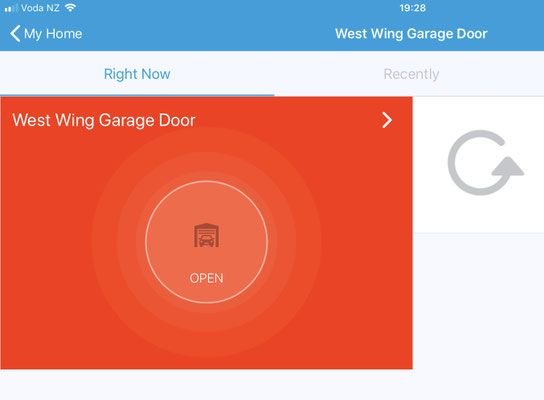
You should now see the correct device handler installed with the device showing in the SmartThings app. Change the name if desired and click Save.
From this point on you can connect pin 7 to ground on your Arduino to prevent the Device Announce. (Again.. you can alter how this works. It's just how I have it for now while I modify things.)

If you toggle the door from open to closed etc you should see similar packets being received and your relay will toggle briefly. (Above)
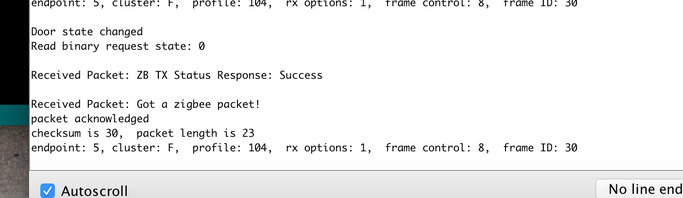
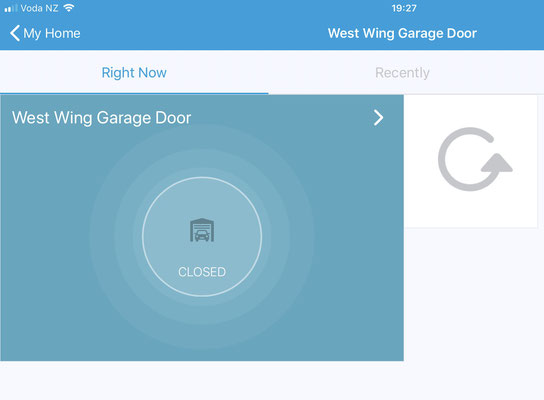
And moving the sensor magnet should produce similar packets above and change the icon state in the app.
I hope the above serves some purpose and is useful to someone. If you get something out of it please drop me a note below.
More to come as I get time..
Update.. I've dumped my SmartThings controller so no further updates I'm afraid.